Select Page

How to start your chocolatier school journey?
Or Learning Professionnal Making slabbed ganache …


I what you’ll get after reading this article:


You’ll know what skills and value you need to make a slabbed chocolate ganache.

You’ll know, in short, what ingredients, equipement and tools you’ll need.

Essentially, you will discover if you are suited for the position of professional chocolatier or to get professional chocolate learning experiences !!!


What is a Chocolatier (Chocolate maker)?


 A chocolatier is someone who has dedicated their life to the craft of making chocolate. They are passionate, knowledgeable artisans who dedicate time and effort to create delicious creations, from bean-to-bar to truffles and other confections. The job of a chocolatier is more than just loving the taste of cacao – it is also involves long hours onf practice. While it may be demanding work, many find that they appreciate the challenge of creating complex chocolate recipes that demand knowledge, experience, fail and attention. Chocolatiers are an indispensable part of many industries, with their creations adding the perfect touch to desserts, treats and more.

The Chocolatier is a master of transformation, turning cocoa into pure pleasure in the form of chocolate bars, candy, bonbons, and every decadent confectionery delight imaginable! It’s an art form that will tantalize your taste buds and leave you craving more.

In order to fully comprehend the material and its reactions, it is necessary to consider various conditions such as treatment, time, temperature, contact with other ingredients and equipment.

Bakers work with ingredients like flour, water, salt, and yeast, while chocolatiers handle cocoa beans, chocolate, water, sugar, fat, and of course the flavor!

The Chocolatier chef creates chocolate confectionery designed to remain fresh for a minimum of one month, or up to one year for larger companies. In contrast, pastries typically have a shorter shelf life of 30 minutes to 48 hours, with some dry and soft biscuits lasting a few additional days.

The professional chocolatier must navigate a delicate balance between ingredients, filling techniques, and confectionery formulations to meet their company’s goals.


How do you become Chocolatier? and start a chocolatier career…


There are various methods to achieve that objective.

Attending a chocolate school (ecole chocolat), catering school, or culinary school as an apprentice chocolatier is a reliable method of learning, although it can be costly and time-consuming.

– Work in a chocolate factory , chocolate shop, in artisan Chocolate industry, one of the best way to learn chocolatier skills,

-One suggestion is to read books about chocolate recipes and experiment with them, as it has been personally tried and tested. I still keep that way …

-The internet provides access to numerous videos and articles regarding the field of chocolate.

Like all craft job you’ll have to push yourself: Practice, try, fail, try again, practice again, and again, and fail again, and practice….then you’ll succeed.

Because you need experiences, you need to see how proceed this chef and that one, and an another one, to compare, to acquire, the knowledge.

Attending a chocolate school is optional, but it can enhance your skills in the field.

My chocolate way experienced:

I currently teach chocolate to professionals in France, Belgium, Luxembourg, Germany, and other locations despite not having a formal degree in the subject. I have gained expertise through hard work and extensive travel, but maintain a critical mindset and continuously question aspects such as ingredients, fat, cocoa, ganache formulation, praliné formulation, chocolate ganache recipes, chocolate candy process (aspect of chocolate making), chemistry of chocolate, and chocolate flavor, mostly, …

I do not say that is the best way. This is just my way, I’m proud of my path. I still making it 🙂

Here is my described food and chocolate experiences 😉 And my Curiculum Vitae 🙂

I believe that everyone have the ability to create their own path.

So you can choose any way to become professionnal chocolatier.

My goal here is to help you to become a better chocolatier.


What is a slabbed ganache? In short… 


Slabbed ganache is a delicious treat for chocolate lovers, and it’s very popular among professional chocolatiers. The process of making slabbed ganache is precise and detailed, requiring a three-day schedule to ensure the flavor and texture turn out perfectly.

On the first day, all of the ganache must be made; then it needs to be cast or spread in frames so it can set for few hours.

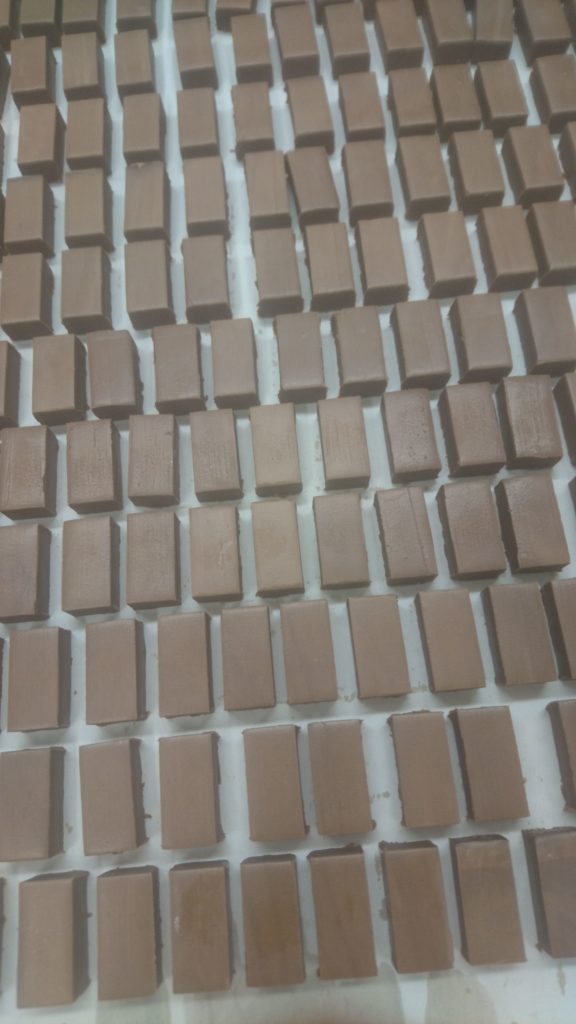
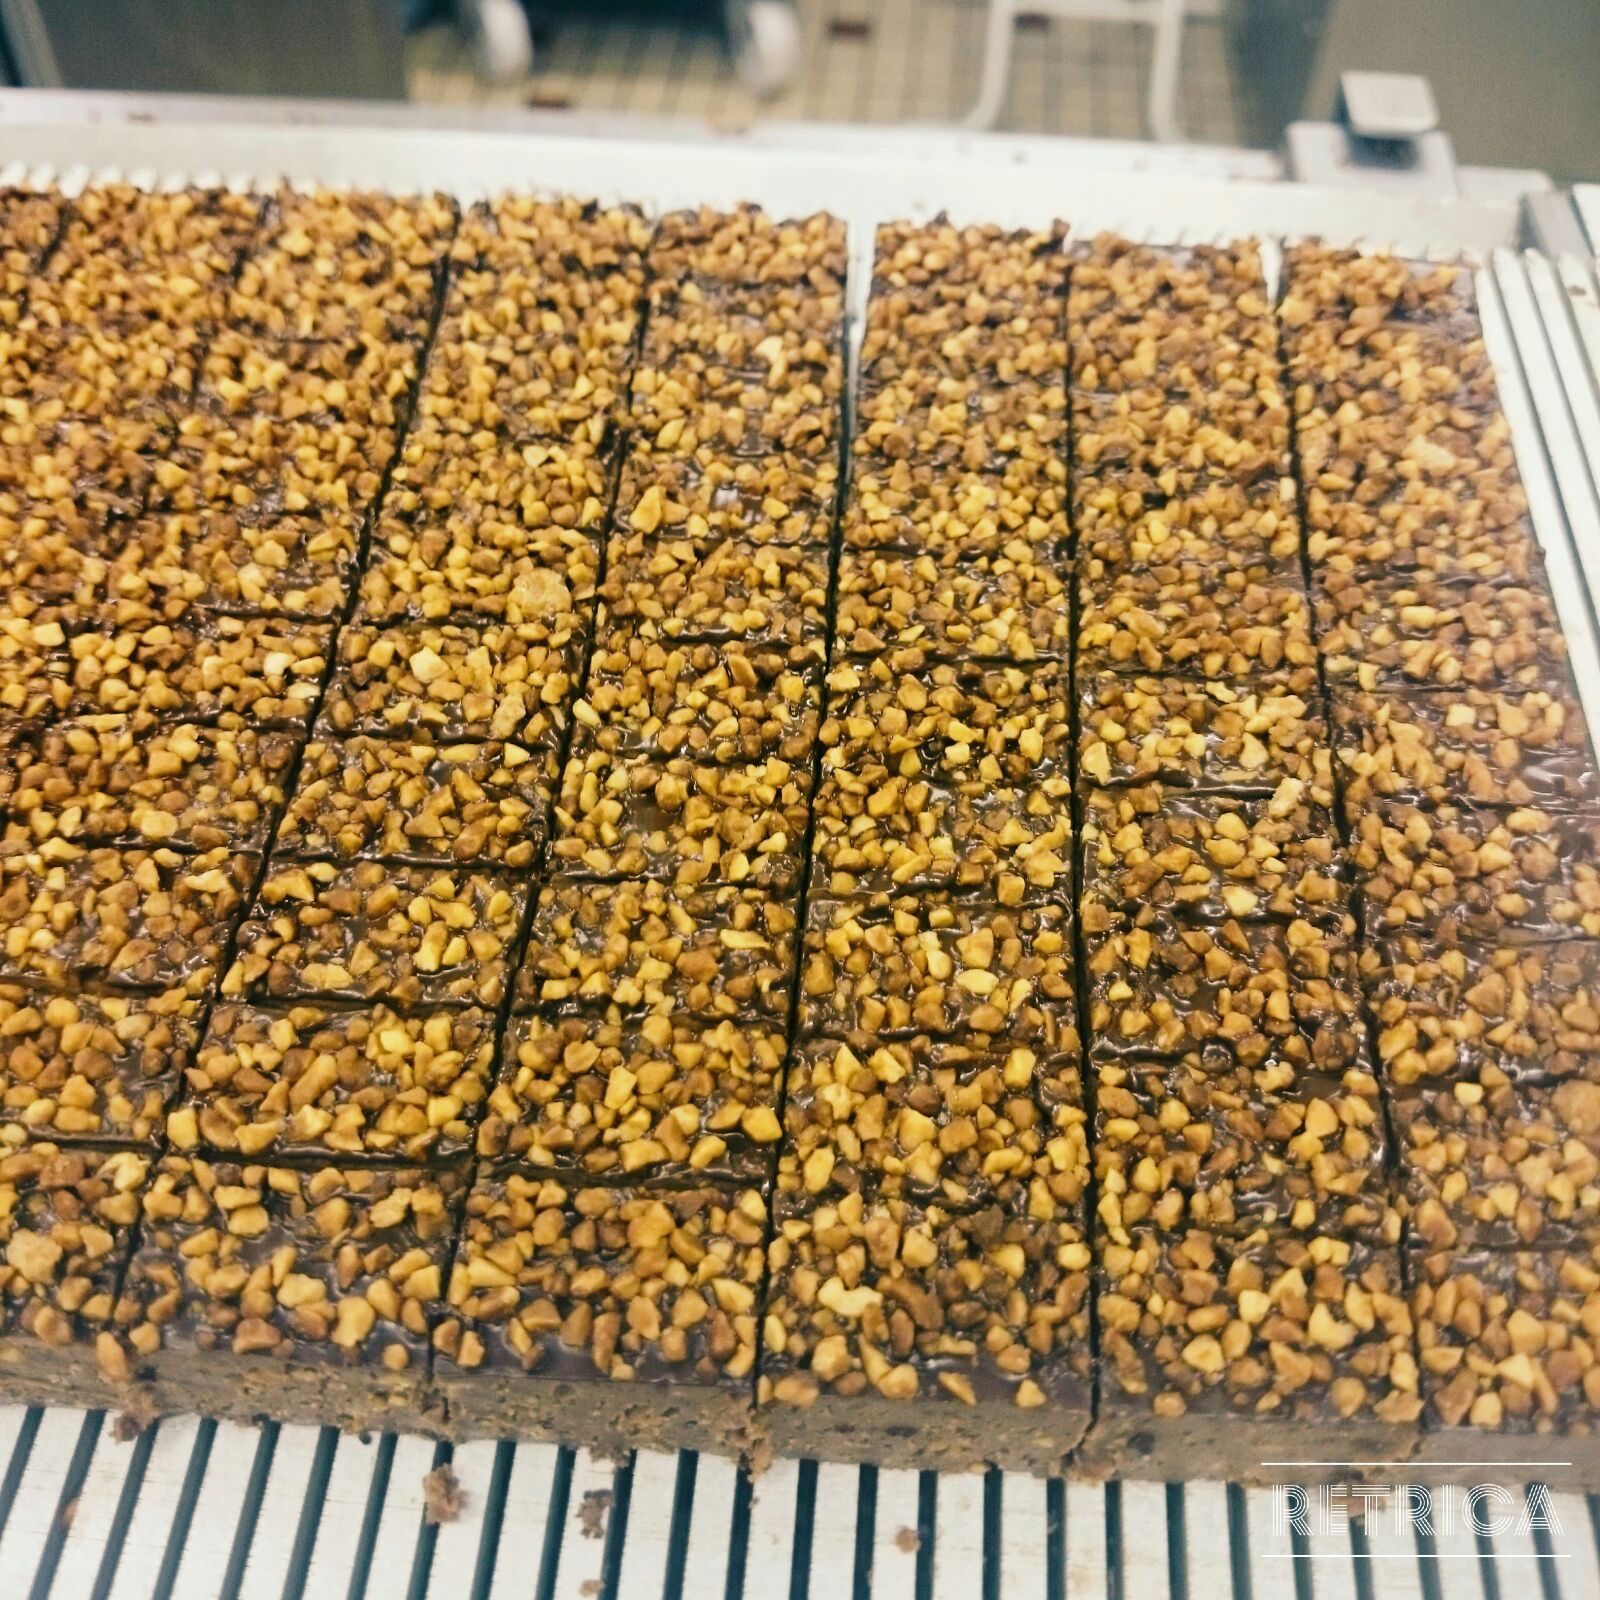
On day two, the ganache is cut and pieces must be separated to allow each side to dry.

Then on day three, the ganache pieces can be enrobed in melted chocolate or decorated with other ingredients before being packaged up for sale. This step could be completed on the second day. I have experience teaching both individuals and companies within a two-day timeframe.

Making slabbed ganache at home can be tricky if you’re not familiar with the techniques necessary for accurate proportions of cream and chocolate ratio or tempering methods when enrobing finished products. Luckily, I will provide, in my online chocolate courses, an easy-to-follow recipe that includes features, process, ingredients, tips, etc. It will make it simpler for novice food crafters to follow along in order for them to get perfect results every time. With his directions, anyone can.


Start with chocolate ingredients…


The ingredients needed to make a slab ganache are as follows:

Heavy cream or Liquid cream ( with 30 to 40% fat); to know the fat content is very crucial. That will determine the ratio of cream you need.

Butter (with 82% fat minimum).

Glucose syrup, dextrose, and invert sugar are commonly used as sweeteners in ganache to achieve a soft texture and longer shelf-life.

Bittersweet chocolate, dark chocolate, black chocolate, milk chocolate, white chocolate,

Important to know are cocoa rate, sugar rate, cocoa butter rate. That

About flavors, I won’t advise any artificial flavours. They do not correspond to my value. I use only naturals ingredients and raw materials. to flavor ganache, you have own ingredients itself that parfumes the ganache, as the heavy cream, the chocolate,… also you have fruit purée, spices, confit fruits, herbs, dried raw materials,…


The Quick process of Slabbed chocolate ganache:

Here are the essentials point to make a slabbed ganache:


Heating the liquids

Pouring the liquids on the Cocoa Elements

Mixing to Emulsify

Pouring the Ganache

Crystallizing the Ganache

Precoating the ganache

Cutting the Ganache

Coating ganache filling


Find more details of making slabbed ganache process here


In my chocolate course online you will get those chocolate skills…


My chocolate online program will help you to master the start of your chocolate school journey:


How to learn basic chocolate skills to make slabbed ganache?

How to manage (slabbed) chocolate ganache at home or in a professionnal laboratory?

How to set a full range of chocolate ganache with different natural flavor?

Understanding chocolate ganache in a simple and concise manner.

Understanding the basics chemistry of chocolate making

Understanding choices and impacts of the main raw materials, on the ganache.

Understanding the main ratio of slabbed chocolate ganache.

The tips of French artisan chocolatier adapted to your needs.

How to extend the Shelf Life of slabbed chocolate Ganache ? part Two

In Part 1, we discussed the ingredients that can help to make your chocolate ganache last longer. Let’s explore what external factors can help your ganache last longer…

🙂

Avoid Light and Moisture.


Yes, the light is quite disturbing for your ganache, but only after a few weeks. It’s called “UV oxidation.” That destroys taste and color. As the title written, the ganache and the chocolate bonbon will oxide even with transparent protection.

I’d like to discuss the topic of moisture issues with the chocolate ganache. Storing chocolate ganache in a refrigerator could lead to the development of mold on its surface.

Take precautionary measures to protect your ganache, whether enrobed or not. Cover the ganache slab with either a plastic sheet, guitar sheet, or catering cling film, making sure there is no air caught in between to prevent microbes from growing. When you take the ganache out of the fridge, make sure to leave the plastic wrap on until it comes back to room temperature. His point is very important. If not, you’ll face to sugar bloom issue.


The cold to cool down the temperature or to store mid-term shelf-life.


It is beneficial for short-term storage.

To keep your slab ganache fresh, store it in an airtight container, bag, or vacuum-sealed pouch. Adding intelligent and active packaging, such as oxygen absorber sachets (or Oxygen Scavengers), can further extend the shelf-life. Through careful formulation of ganache and strict adherence to the production process, you can increase the shelf life of your product by up to 6 months.

To ensure maximum freshness, always remove your ganache from cold storage and let it reach room temperature before taking it out of the plastic packaging. One possible consequence of improper preparation is sugar bloom appearing on your ganache.

More, a positive cold, ranging from +0°C to 5°C, is ideal for cooling down your slab ganache. This is very useful for making slab milk chocolate ganache and white chocolate ganache.


Freezing for Long-Term Storage.

If you follow the same guidelines as before regarding wrapping your slab ganache in plastic, here are the storage conditions that are similar.

Through this, the shelf life can be extended up to 18 months. I formerly employed that technique multiple times and for the long term. The result is quite astonishing.

Defreezing is a very important part of the process. To reiterate, you must only remove the plastic wrap from your ganache slab when it has reached room temperature. If not careful, sugar bloom can form on your ganache due to condensation.


The Slab chocolate ganache Methods and Process

I won’t repeat the steps of my recipe for slab chocolate ganache, which you can find in this link.

We’ll go over the particular methods that can help prolong your ganache’s longevity. The goal is to minimize bacterial and microbial exposure as much as possible. Here are some tips to prolong the shelf life of your ganache:


Chocolate Ganache  pasteurization


In that process part, the target is to kill most of the microbe in the liquid part, where bacteria have more potential to develop.

For that, we boil the ingredients that contain water, even those that seem Ok, like glucose syrup, and butter. Because in most of the manufacture, these ingredients could be contaminated by scraper or ladle, for example.

This step is essential for fruit or tea ganache, which contains components that are high in bacteria. These bacteria are not inherently bad, but they can develop in the wrong direction.

Unfortunately, the tea is usually not very clean. They were unable to pasteurize it. Doing so would ruin all of its delicious tea flavors. This is the same principle for the fruit purée. All fruits are not pasteurized as well.

Temper methods for ganache


Making sure the ganache square is stabilized for a longer period of time is important. This can be done with a properly crystallized chocolate ganache. As the fat from cocoa beans builds up a perfect crystal arrangement of cocoa butter (Form V or also called Beta) in the ganache, good results will emerge. The more smoothly crystallized the cocoa butter in the ganache, the greater its shelf life, which aids all related operations.

Two ways to achieve this are through the tempering process:


– Seeding cocoa butter crystallised :


We require cocoa butter manifested into a fine powder with the ideal crystalline shape. You shall incorporate it; from 0.3% to 1.5% of the total ganache mass in the ganache at 33/34°C. Subsequently, mix it and rapidly pour it into the prepared frame. Where might one discover this type of cocoa butter? You have Barry’s products, such as Mycrio cocoa butter, but you also possess the option to craft it yourself…

All you have to do is temper some cocoa butter efficiently. Put it in a small container and cool it. When the next day arrives, take off the molding and use a peeler or grater (for larger amounts) to grate. Then start!


– Seeding Cocoa butter Pre-crystallised

That one is very similar except that the cocoa butter is in a “beurre pommade” texture, with the best crystals (Form V or also called Beta) can be. Usually, you are between 32.5°C and 34°C, regarding to the cocoa butter quality. 

Add between 0.5% and 3% of the total ganache mass to the mixture at 33/34°C for successful incorporation. Next, blend it quickly and slab it into the prepared frame.

The quantity and type of ganache you are making will determine the amount of seeding needed for each technique.


Workstation Cleaning

Another point is to clean and disinfect everything!

I used to spray often enough, alcohol on my tools, bowl, workstation, and hands. Like I’m quiet still in my mind. This includes any tools used for mixing or shaping the ganache, as well as any bowls or containers used to store it. Additionally, hands should be washed thoroughly before handling the ganache.

Everything you touch is everything can be contaminated. Safe food is one of the Basics.it is essential to keep all surfaces clean and sanitized.


Moisture Environnement vs Chocolate


One of the keys to extending the shelf life of slabbed chocolate ganache is controlling the moisture environment around it.

Humidity plays a major role in determining the lifespan of chocolate. Ideally, the relative humidity should be between 45% and 65%. With less than 45% RH (Relative Humidity), the ganache will dry quickly. If the humidity is over 65%, you could get condensation on your ganache and chocolate filling, meaning that the surrounding environment has reached its dew point. This will give us a good chance of having a sugar-blooming effect.

It is not easy to perfect that task. A hygrometer would enable one to ascertain one’s status regarding the Relative Humidity of the chocolate lab. An air conditioner could be quite advantageous as well. In effect, an air conditioner takes charge of temperature, but it also moderates the moisture in the atmosphere. The difficulty usually lies with a superfluous moistness hanging in the air.


Some different wrong ways to process for your chocolate ganache


Steer clear of making wrong decisions:

-I heard of the double boiler method. This is gibberish from me. If you pasteurize once, there is no requirement for a second pass. This is wasting effort, and it likewise desiccates the ganache far more. Consequently, your ganache formula becomes upset and off-balance.


-To cool or pre-crystallize the ganache on the marble (or granite) directly. That increases the contamination drastically because your marble is never clean 100%. Additionally, this technique can introduce small air bubbles that will make the ganache stiffer and drier. More, it’s not a very hygienic practice.

-To include some unordered cocoa butter crystals. Yes, this promptly arrived. Primarily, you must attain the proper shape of cocoa butter once included. Then when preparing the ganache, don’t transcend the temperature of 34.5°C. That could liquefy the cocoa butter crystals. This tempering method is essential. Thermometers are fundamental tools for that issue.


Conclusion for the shelf life of your slabbed chocolate ganache


In short, to answer all those questions :

How long can you keep chocolate ganache in the fridge for ? …

What kind of preservative do you use for chocolate ganache ? …

How do you preserve chocolate ganache ? …

How many days in advance can you make ganache ? …

How do you preserve milk chocolate ganache ? …

How long can ganache stay at room temperature

how long does chocolate ganache last in the fridge

How do you increase the shelf life of ganache ? …


I going to summarize, here are the ways to increase the shelf-life of chocolate ganache:

– Increase the amount of sugar in the ganache.

– Increase the ratio of dry ingredients in the ganache.

– Decrease the water rate.

– If the flavor permits, you can add some alcohol to your ganache.

– Keeping in the refrigerator with a covering.

– For long-term storage in the freezer, be sure to provide good insulation.

– By pasteurizing (boiling) the liquid component of the ganache.

– Disinfect your workstation.

– Master the Humidity of the place you work.

-Temper your ganache before pouring it into a frame.


All those moves could and can change the texture and the taste. The quality of ingredients is also crucial. 

As for quality, I mean gastronomic, hygienic, organic, texture,…

These changes are all related.