Introduction of making slab chocolate ganache
Making a delicious slabbed ganache is an easy and rewarding task that can be accomplished with just a few simple ingredients.
This decadent treat is perfect to have in your cook notebook and your basics one in your craft lab.
The best part about making your own ganache is that you can customize it to your liking by adding different flavors or ingredients, like an alchemist or a professional Chocolatier 😉
.
With this guide, you will learn how to make a basic slab of chocolate ganache that will be sure to impress your clients and your palate 😉
Jump to the slab ganache process!
Gathering the ingredients
The ingredients weighing
Even though it may look simple, this is extremely important.
Precisely measuring ingredients is essential for successful chocolate production. If it’s gritty, won’t set, etc., then the first place to check is the measurement of ingredients.
This is extremely crucial!
Our target will be achieved by ensuring the appropriate amounts of each component are in balance. The ganache formula plays an important role in the process, affecting the shelf-life of ganache…
This is my special ability !!!
I’ll create another article on this subject.
Heavy cream, dairy cream, butter, fruit juice, and other liquids.
All liquids, including liquid cream, heavy cream, unsalted butter, and fruit juice, as well as any other substance containing water, …
Ganache is typically made with heavy cream as the liquid component. Indeed, this is the most well-known ingredient.
In short, the cream usually contains 30-40% fat, 55-65% water, and 5-7% of proteins, carbohydrates, trace elements, and vitamins.
We can substitute water, other types of fat, juice, infused water, and more in place it and become a flavoring ingredient.
Here we are. I’ll let you explore the amazing possibilities of ganache filling … 🙂
Dry Ingredients such as custard sugar, glucose syrup, …
These raw materials need to be processed (or not) and dissolved in the water solution:
This includes brown sugar, unrefined sugar, honey, custard sugar, granulated sugar, inverted sugar, glucose syrup, dextrose, inulin, polysaccharide, and sorbitol, among other sweeteners.
Besides cocoa fat or cocoa butter, other types of fat range from classic animal butter (82% fat) from cows, sheep, and goats… Vegetable oils such as coconut, olive, hazelnut, almond, and rapeseed can be used … There are many other customs and traditions from different cultures that I’m unaware of.
The flavoring ingredients provide a complementary scent to your ganache. Here, you will find vanilla beans (or powder), cinnamon, tea, coffee beans, salt, herbs, roasted seeds, praliné, and more.
Cocoa butter ingredients
Here we enter the sweet center of Chocolate & Co: the heavenly ganache.
There is no specific chocolate for ganache; cocoa products come in many forms, such as dark chocolate, milk chocolate, cocoa paste, cocoa liquor, cocoa mass, bittersweet chocolate, semi-sweet chocolate, and white chocolate. What are the differences between them?
It’s quite easy. Cocoa beans that have been roasted and dried are used to create chocolate, which is composed of roughly 50% cocoa butter (a natural vegetable fat from the beans), and the other 50% consists of cacao torteaux.
Dark chocolate is made up of crushed cocoa beans and sugar, with the amount of sugar ranging from 50% to 1%. No other fat than cocoa fat is used.
Milk chocolate is composed of approximately 10% cocoa bean, whole milk powder, sugar, and cocoa butter.
In order to make white chocolate, one has to have milk powder, sugar, and cocoa butter. The quality of the milk powder and its fat content have an impact on the final taste.
The ratio of chocolate is critical for the ganache recipe.
Cocoa mass, paste, or liquor (in liquid form) made from 100% cocoa bean can be used. This recipe takes it to the next level – with less sugar, more flavor, and a richer chocolatey taste!
The source of cocoa beans can also affect their flavor.
The form of chocolate has no significant effect on the process. It has to be in drops, chips, or partially crushed.
My slabbed ganache process
This is the procedure I use to make my ganache recipes. The principle is almost the same for all of my ganaches.
Heating the liquids
We will heat the water-containing liquids and the dry ingredients (except cocoa raw material) between 70°C and 100°C. Personally, I prefer to heat liquids and ingredients for pasteurization, which optimizes the ganache duration shelf-life. The target temperature will be determined by the type of ganache you make.
. Which type of ganache are you making?
How long time ganache duration would you seek?
Pouring the liquids on the Cocoa Elements
Once we reach this temperature, we will pour the warm liquids or cream over chocolate chips (or others) inside a bowl.
I have heard that some guys used tempered chocolate in the ganache process. I do not recommend it.
We let it melt for 5 to 7 minutes without stirring. The goal is to save time and manipulation. During that time, clean up or make something else…
Mixing to Emulsify
Then we stir with a whisk at first, and we mix with an immersion blender or mixer to make a smooth ganache.
My favorite blender is one for a small capacity of up to 1.5kg Bamix Gastro,
and my favorite food processor for a bigger capacity of more than 2 kg Robot-coupe R4 Blixer,
and for a professional capacity of more than 10 kg Stephan UM22.
Cool until the temperature reaches a range between 29°C and 35°C maximum. Goal temperature is crucial.
For those who are experienced in making chocolate, the form of cocoa butter is something quite technical. Pre-crystallizing the mass helps immensely when producing large quantities of ganache. The aim is to avoid unstable cocoa butter crystals. I will discuss this process further in another article.
Pouring the Ganache
Once that was done, we framed the ganache.
This frame determines how thick your chocolate slab bonbon will be. The typical size range is from 5 mm to 16 mm high onto the prepared frame. Depending on your aims, what can vary is the taste, texture and consistency, flavor, presentation, eating method, chocolate box, and packaging.
Afterward, we scrape the chocolate mass ganache for uniformity, with the exception of very liquid ganache like milk chocolate ganache and white chocolate ganache. Due to their liquid consistency, the ganaches will spread out on their own.
One chocolate ganache tip: Pour into a 15 mm high slab a nice dark chocolate ganache; you can cut it with a guitar, then roll them, and start chocolate truffles. You can also let them in a cube shape to make truffles. To have a nice feeling, I recommend getting a thin coating of chocolate. Of course, the quality chocolate plays here, such as everywhere 🙂
Crystallizing the Ganache
To set and crystalize the ganache, there are several key factors to consider::
– The temperature of the lab has to be between 16 and 19°C
-To ensure optimal lab conditions, the relative humidity (RH°) must stay between 40% and 65%. Other products that are produced may also affect this rate.
Cocoa crystallizing of the ganache layer needs 8 to 16 hours to be done.
Precoating the ganache
Cut the ganache into frames, either 35 cm x 35 cm (approx) if using a standard guitar cutter or 40 x 60 cm (approx) if using a waterjet cutting machine.
Afterward, both sides of the ganache layer need to be pre-coated. I usually start by giving it a light coat of chocolate that I will later use to enrobe.
I usually melt dark, milk, and white chocolate at about 35°C-36°C without pre-crystallizing. This allows me to have enough time to spread the ganache on the slab. The pre-coating should be approximately 1/2 mm thick. This is a very, very thin layer of chocolate. The purpose of this is to reinforce the ganache bonbon and make it more distinct.
Cutting the Ganache
Two options:
The most popular and easy way to cut ganache is by using a Guitar slicer.
I like that very much: A guitar made in Germany.
That tool is dependable, trustworthy, and comfy. I’ve used it for over a decade. It comes in two sizes – small and regular, which is a 33/36 cm edge frame ganache,
A second option is the High-Pressure Water Cut Machine, a worthwhile investment for artisans who produce more than 10 tons of chocolate annually. It might be pricey, but it certainly proves to be highly effective and creative. I would highly recommend Hydroprocess in this case.
This machine requires a dedicated workspace.
Coating ganache filling
The ganache bonbons are ready. It needs to be coated with pre-crystallized chocolate manually or using an enrobing machine… However, this is for a different article. 🙂
Slabbed Ganache, my conclusion
In conclusion, slabbed ganache is a great way to make delicious and unique chocolate treats. It requires a few simple ingredients and steps that you must stick to, to create a beautiful and tasty treat that can be customized to your liking. The key to success is making sure the ganache is not too soft, as it will be impossible to cut with a guitar or machine. Additionally, the ganache must be well balanced by formulation in order for it to have the right texture, taste, and shelf-life chosen. Finally, slab ganaches are known for having more flavor than traditional soft fillings in molds due to their lower sugar and fat content. With these tips in mind, you can now confidently make your own slab of chocolate ganache!
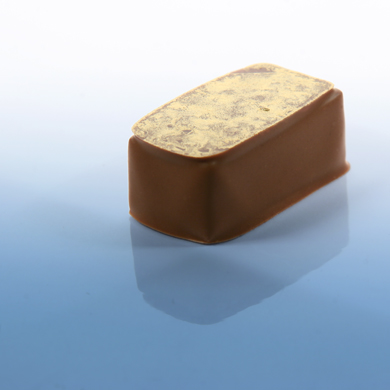
Tonka Ganache Enrobed
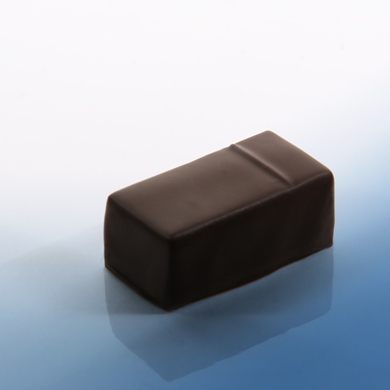
Prune Slabbed Ganache
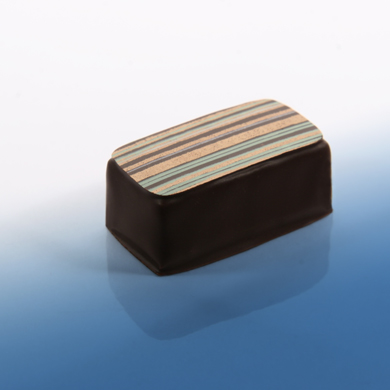
Long Pepper from Java Ganache